So you’ve taken out a Zego policy (great choice!) and now it’s time to start making the most of it. As a Food Delivery Driver, you have the freedom to choose how and when you work, and who you work for.

In this article, we’ll show you how to link your Zego account to your Uber Eats account.
1. Download the Zego Delivery app from the Apple App Store or Google Play Store.
2. Open the Zego Delivery app on your smartphone.
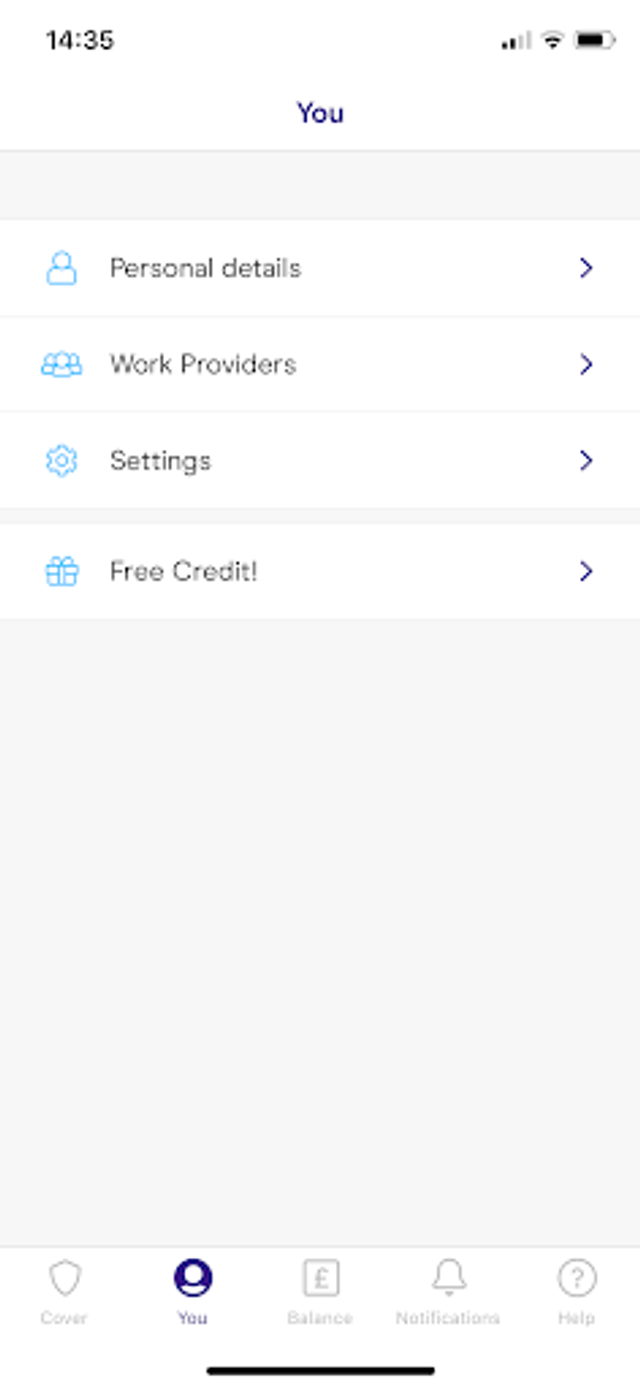
3. Tap on the “You” tab and then select “Work Providers”.

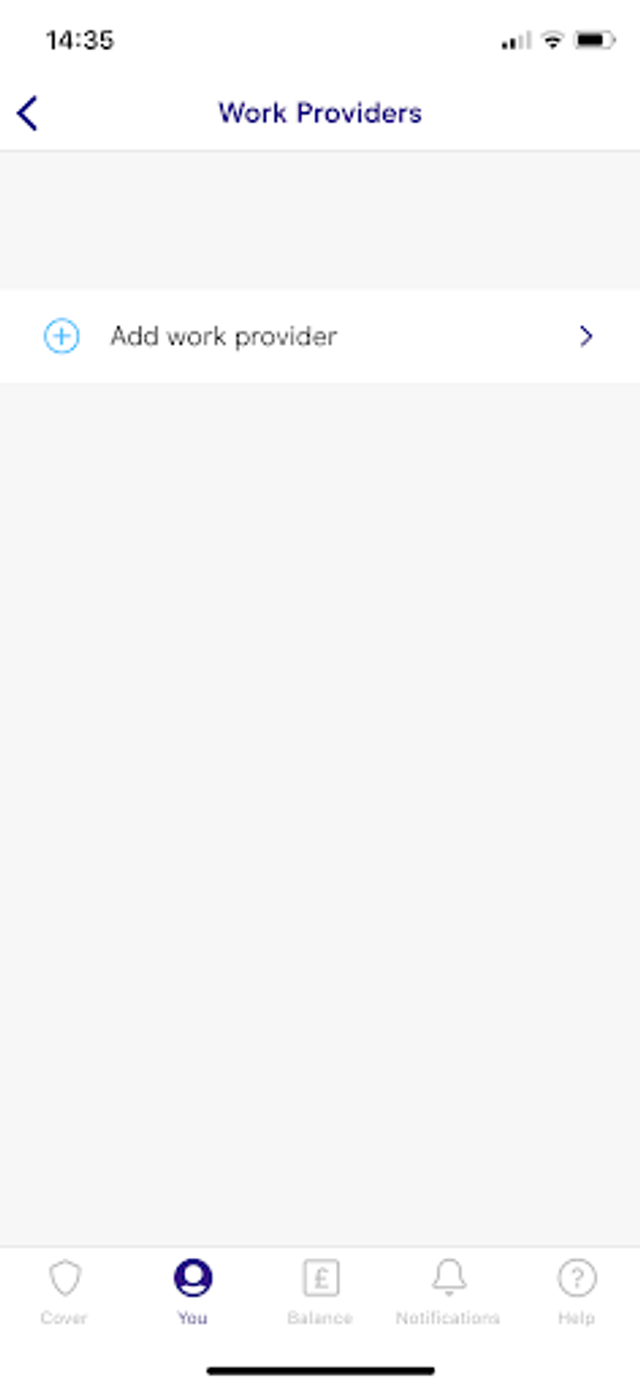
4. Select “Add work provider”.
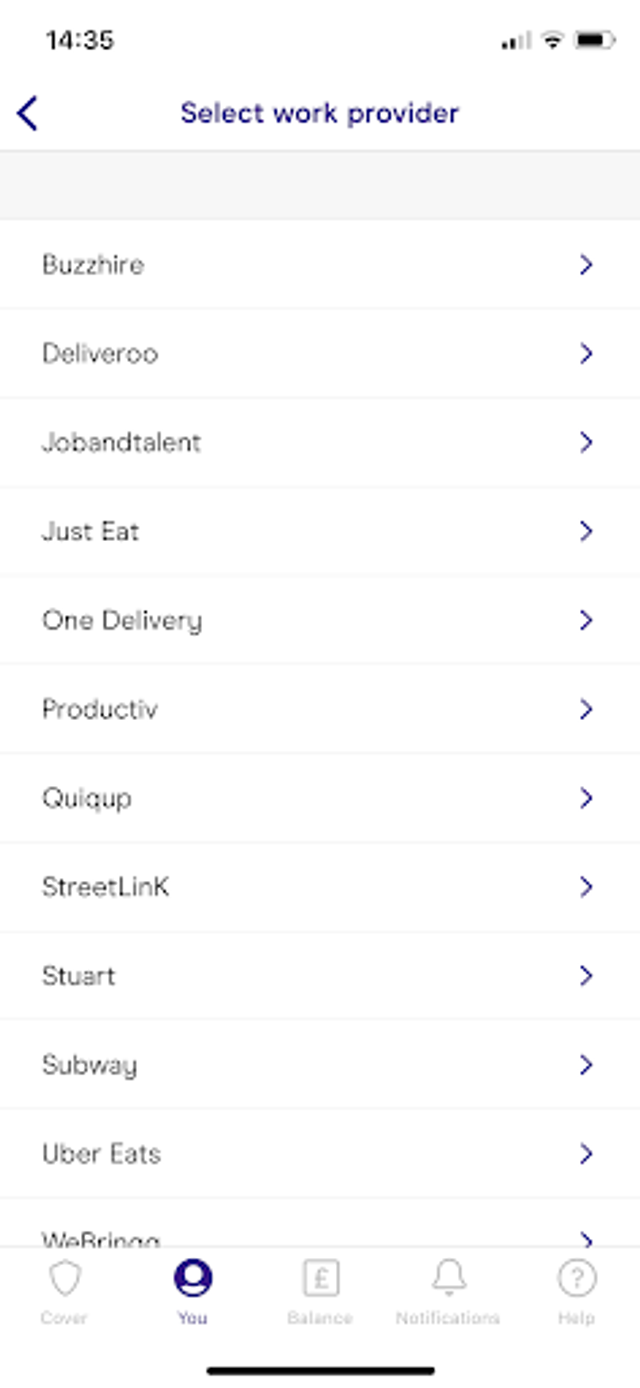
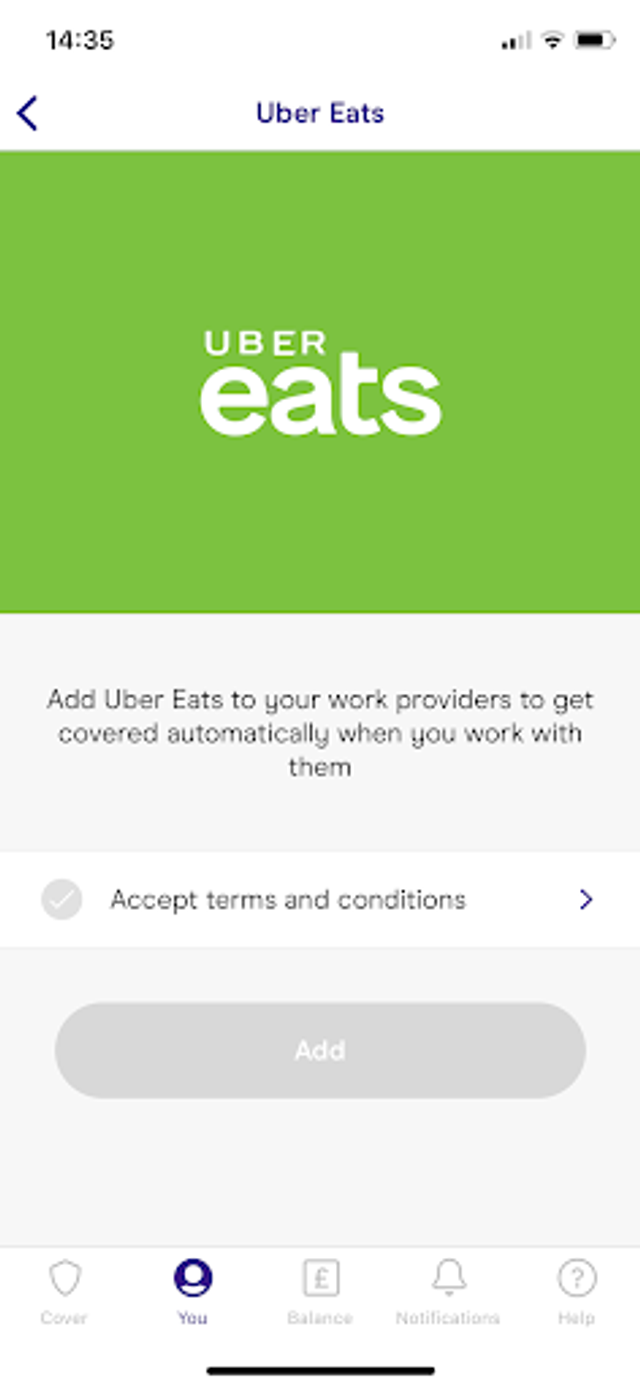
5. Choose “Uber Eats” from the list of work providers.
6. Tap “Accept terms and conditions” on the Uber Eats page.
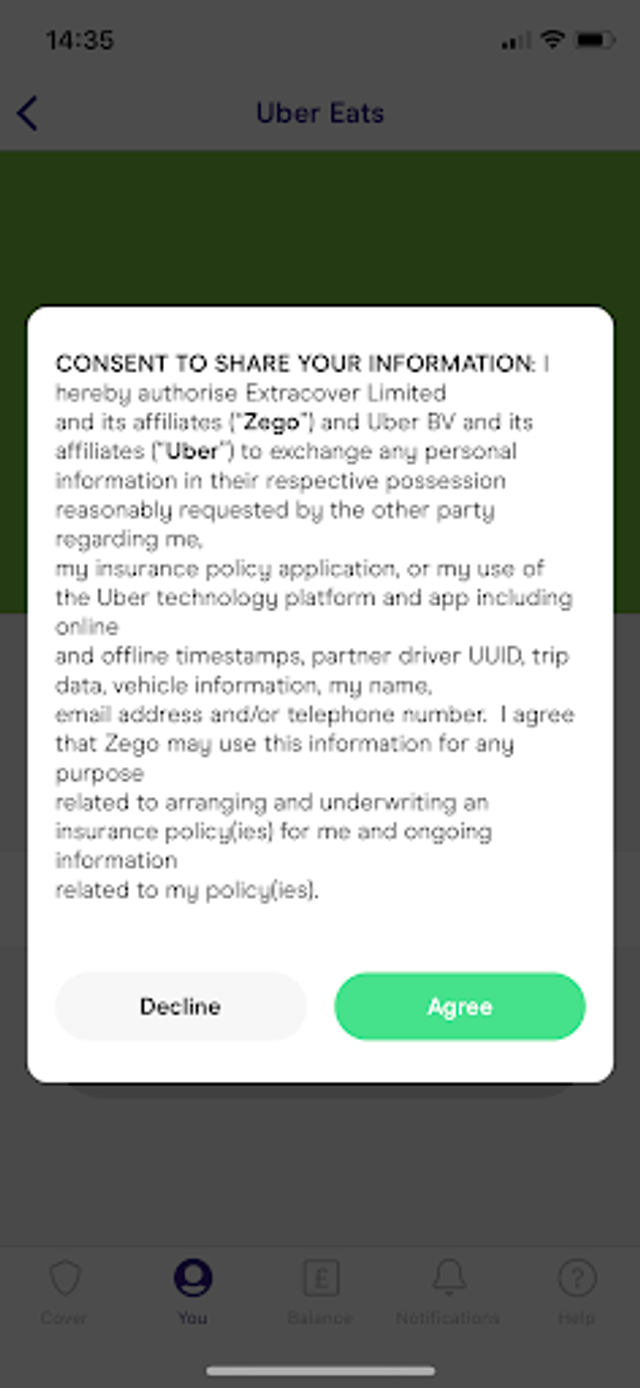
7. Read the full terms and conditions, and then tap “Agree”.
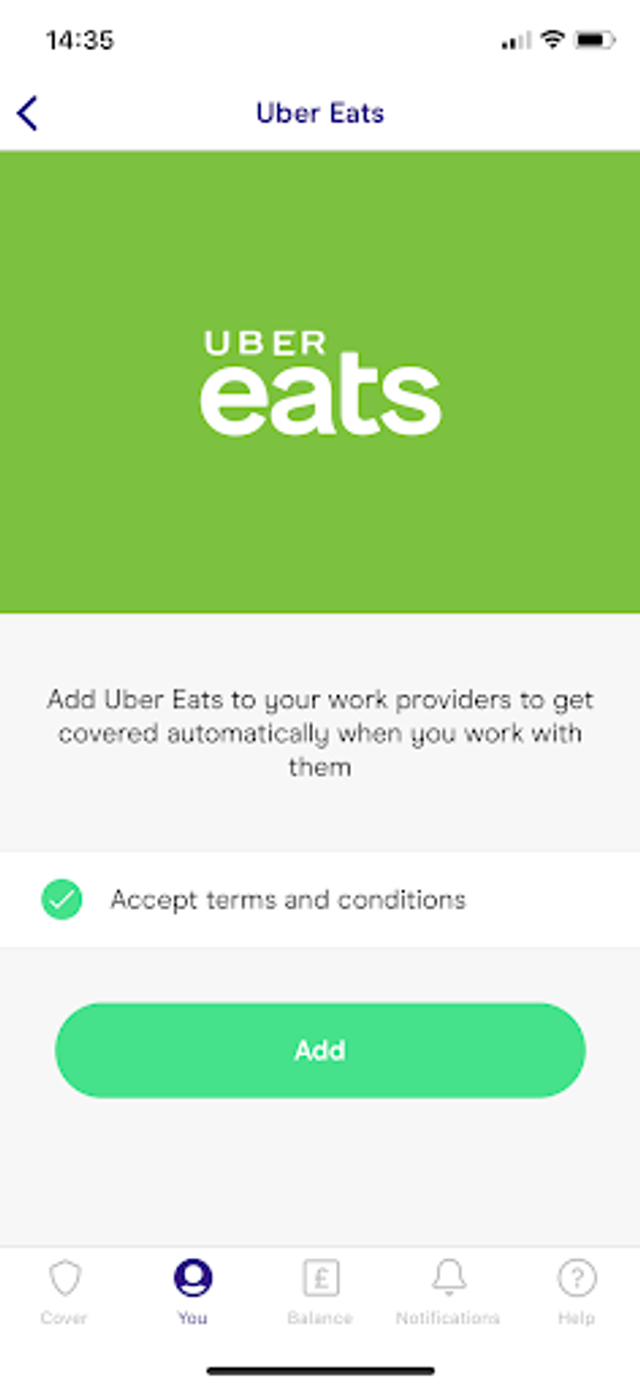
8. Tap “Add” to add Uber Eats to your account.
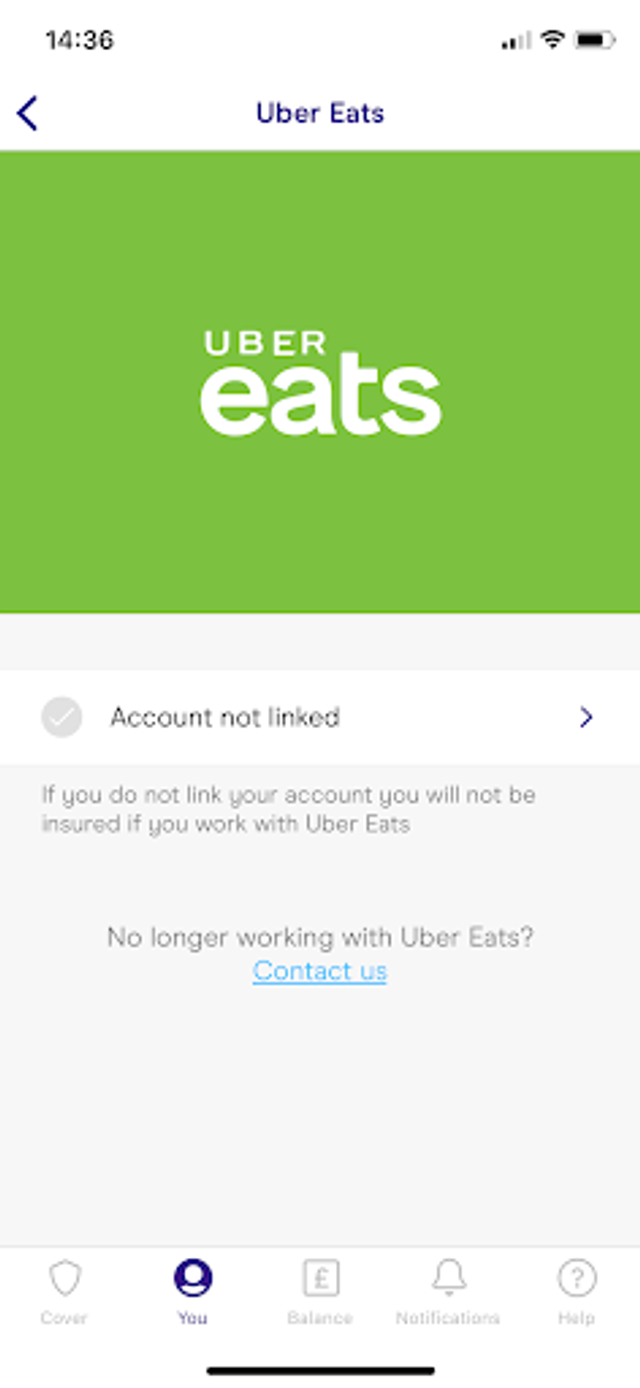
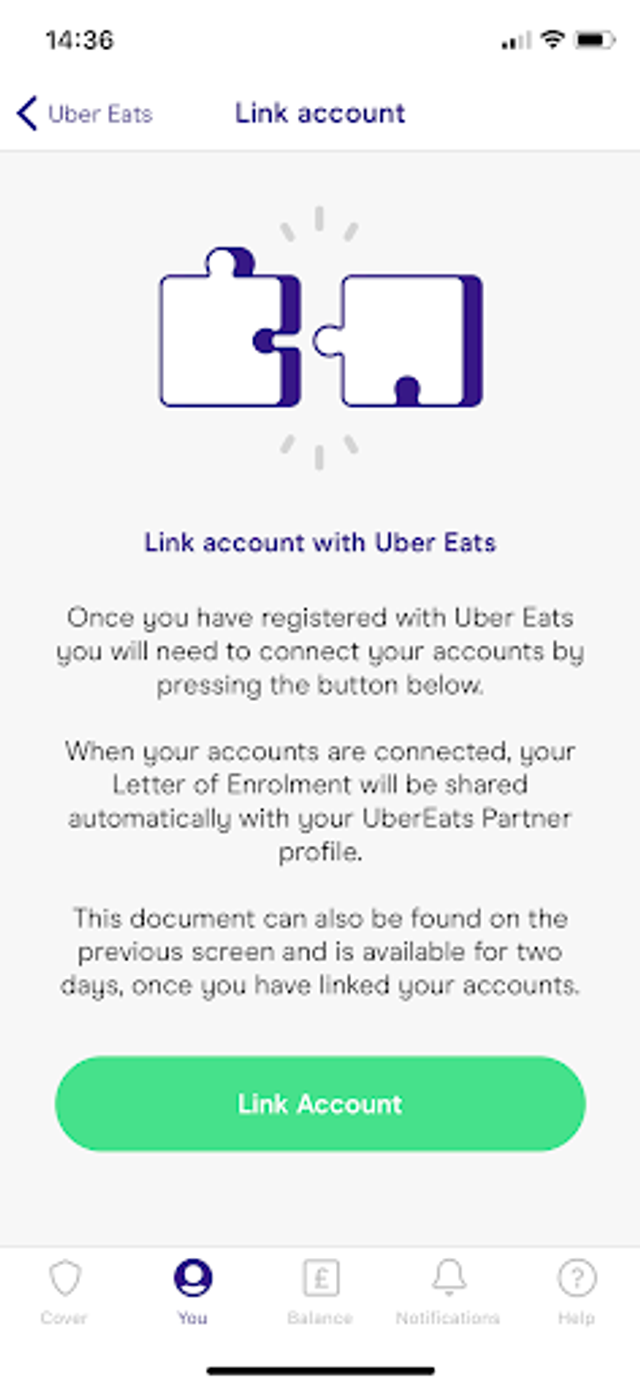
9. Your account still needs to be linked to Uber, tap “Account not linked” to continue set up.
10. Tap “Link Account” to continue. After you tap, you’ll be sent to an Uber webpage to finish setting up your account.
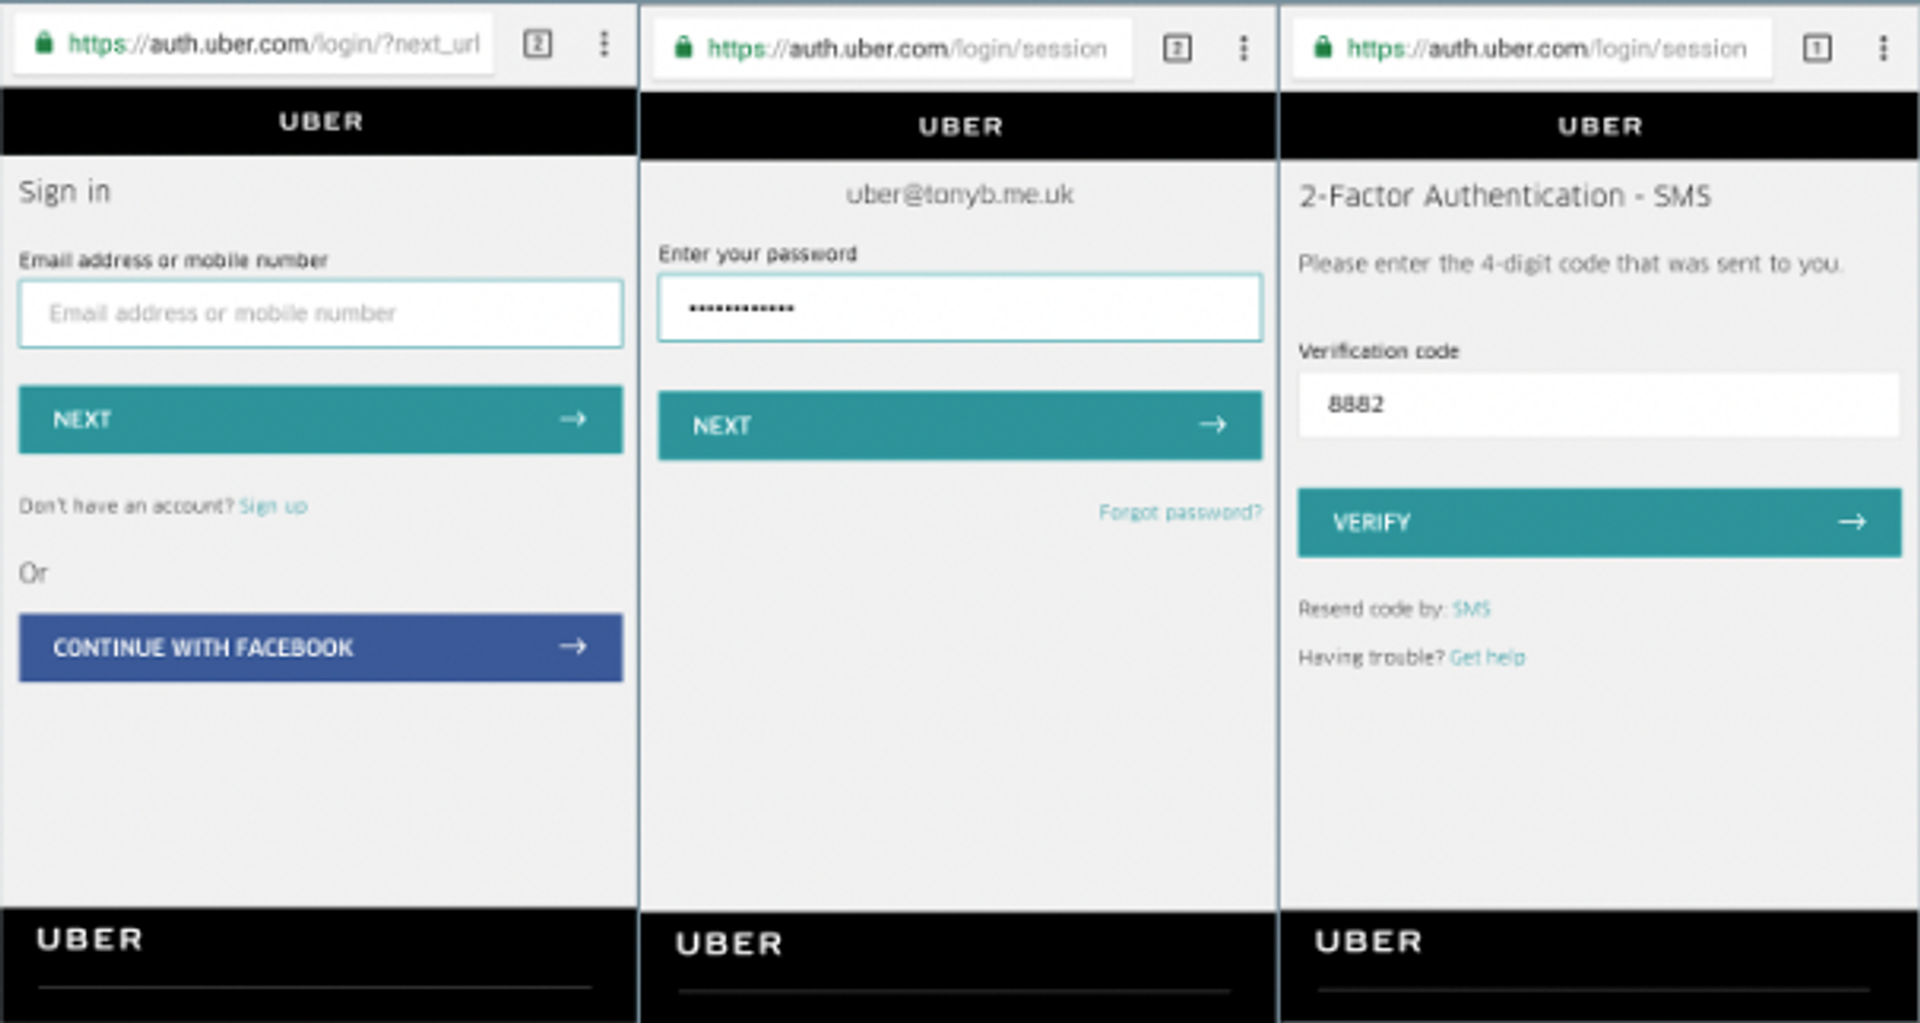
11. Log into your Uber account using the same email address you have registered with Zego, your password and an SMS verification code from Uber to finish setting up your account.

12. You’ll need to agree to permissions if you haven’t linked your account to Uber before.
If you already have your Zego registered account linked to Uber, you can skip to the next step.

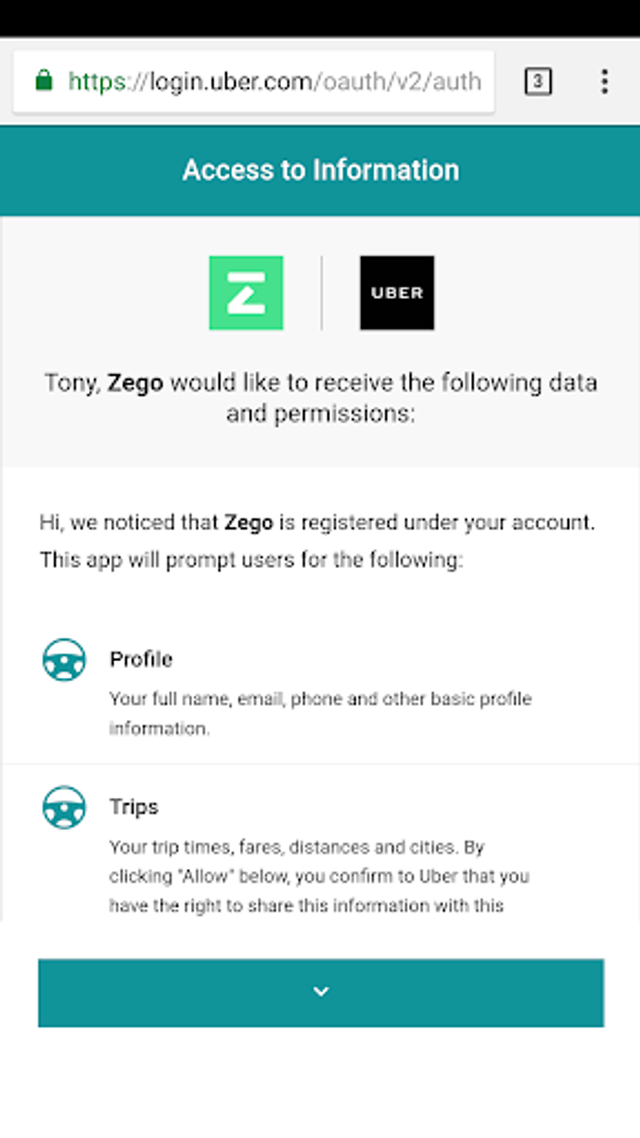
13. Once you agree to permissions, you’ll be redirected to zego.com to finish the work provider linking process.
If users are already logged on to uber.com and have already authorized Zego at Uber, they may end up on this page as the only step.